Cup and Handle Pattern: William O'Neil's Classic Breakout Setup
What is the Cup and Handle Pattern?
The cup and handle is a bullish continuation pattern identified by William O'Neil in How to Make Money in Stocks (4th ed., 2009). It describes a U-shaped consolidation (the cup) followed by a short, tight pullback (the handle) before a breakout to new highs.
Honest status note: in EasySwing's out-of-sample permutation testing, the Cup and Handle did not reach a conclusive edge verdict — the result was neither strong enough to credential nor clearly dead. It is not currently in the active picks. This guide covers the mechanism, which is classic and worth knowing, but do not read a headline win rate into it. Live, tracked stats for the strategies that did clear the bar are on the performance page.
O'Neil's original research on the greatest stock market winners from 1880 to 2009 found that the cup and handle was one of the most frequently occurring base patterns among stocks that went on to gain 100% or more. Bulkowski's Encyclopedia of Chart Patterns (3rd ed., 2021) independently confirmed a 61% success rate for the pattern across 1,044 historical samples, with an average price gain of 34% after breakout.
The core hypothesis: a U-shaped base signals institutional accumulation -- large funds building positions over weeks or months. The handle represents a final shakeout of weak holders before the stock resumes its prior uptrend.
Anatomy of the Cup
The cup is the large, rounded consolidation that forms after a prior uptrend. It looks like a bowl or U-shape on the chart -- not a V-shape.
Key characteristics:
- Prior uptrend of 30%+: The stock must have advanced meaningfully before forming the base. Without a prior run, there is no "continuation" to continue.
- Cup depth between 12% and 35%: A correction of less than 12% is too shallow to qualify -- it has not shaken out enough weak holders. More than 35% suggests structural damage, not a healthy pullback. O'Neil noted that cups deeper than 33% had significantly lower success rates.
- Cup duration of 3-6 weeks minimum: Shorter formations lack the institutional accumulation time needed to build a solid base. Longer cups (8-12 weeks or more) are actually stronger -- more time allows institutions to accumulate larger positions without driving the price up.
- U-shape, not V-shape: A gradual rounding bottom indicates orderly accumulation. A sharp V-bottom suggests a panic-driven snap-back, which is less reliable.
- Volume signature in the cup: Volume should be heaviest at the start of the decline (left side of the cup) and lighten as the base matures (right side). This indicates selling pressure is drying up.
Anatomy of the Handle
The handle is the short, tight pullback that forms in the upper portion of the cup before the breakout. It is where the final weak holders exit and the pattern completes.
Handle requirements:
- Positioned in the upper 15% of the cup's range: If the cup's high is $100 and its low is $70, the handle should form above $95.50. A handle that drifts into the lower half of the cup invalidates the pattern.
- Handle depth less than 12%: The pullback should be shallow -- typically 5-10%. A handle that corrects more than 12% from the cup's right-side high is too deep.
- Volume drying up: Average volume during the handle should be below the 50-day average. This is the single most important confirmation -- low volume means there are no sellers left.
- Duration of 1-3 weeks: Handles shorter than a week are too brief; handles longer than 4-5 weeks start to look like a new base forming.
- Slight downward drift is ideal: The handle should drift slightly lower or move sideways. A handle that drifts upward may lack the shakeout effect needed to flush weak holders.
The handle is essentially a miniature VCP within the larger cup structure -- a final volatility contraction before the breakout.
The Volume Signature
Volume behavior is the single most important confirmation for a cup and handle breakout. The pattern should display a clear three-phase volume arc:
- Left side of cup (decline): Heavy volume as the stock corrects from its prior high. Institutions may be distributing initial positions or the broader market may be pulling back.
- Base of cup and right side (recovery): Volume gradually decreases and stays below average. This is quiet accumulation -- institutions are building positions without drawing attention.
- Handle: Volume contracts further, often to the lowest levels in the entire pattern. Fewer than the 50-day average shares traded is the benchmark. This "dry up" is the final confirmation that sellers are exhausted.
- Breakout day: Volume expands dramatically -- O'Neil specified a minimum of 40% above the 50-day average volume. This surge confirms that institutional buyers are driving the move, not retail momentum.
Without the volume expansion on the breakout, the pattern has a much higher failure rate. Bulkowski's data shows that high-volume breakouts from cup and handle patterns outperformed low-volume breakouts by an average of 12 percentage points over the subsequent 3 months.
Entry Checklist
Before entering a cup and handle breakout, verify every item on this checklist:
- ✅ Prior uptrend of 30%+ before the base formed
- ✅ Cup depth between 12% and 35% from the prior high
- ✅ Cup duration at least 3-6 weeks (longer is stronger)
- ✅ Handle forms in the upper 15% of the cup's depth range
- ✅ Handle pullback depth is less than 12%
- ✅ Volume drying up in the handle -- below the 50-day average
- ✅ Breakout above the handle high occurs on 40%+ above average volume
- ✅ RS rank is 80 or higher at the breakout (ideally 90+)
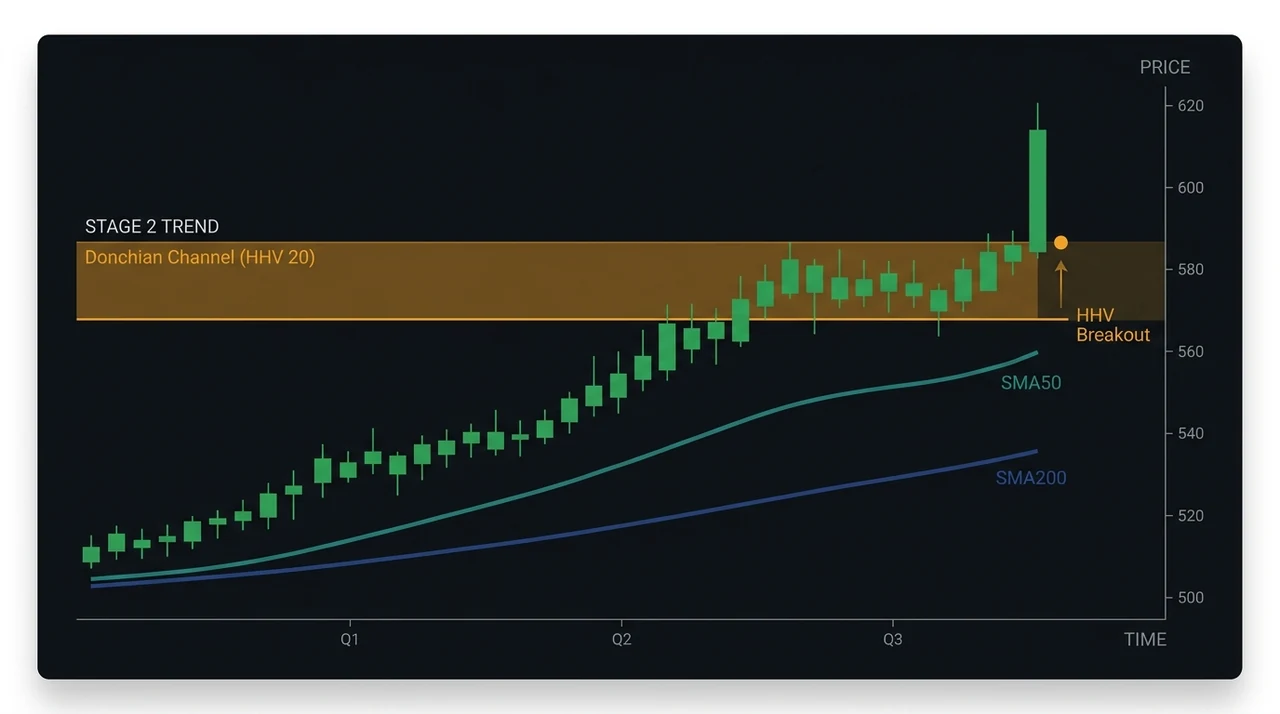
- ✅ Stock is in Stage 2 -- price above rising 50-day, 150-day, and 200-day MAs
- ✅ Market regime is Trending Up (Strong Bull)
- ❌ Do not buy if the handle drifts into the lower half of the cup
- ❌ Do not buy if volume is heavy during the handle (institutions may be distributing, not accumulating)
- ❌ Do not buy if the breakout occurs on below-average volume
- ❌ Do not buy cup and handle setups in Ranging or Trending Down regimes
Stop Placement and Targets
The cup and handle uses wider targets than tighter patterns like the VCP, reflecting the larger base structure and longer expected hold time.
Stop loss: 1.5 ATR below the entry price. This provides enough room for normal post-breakout volatility while keeping risk controlled. An alternative stop placement is just below the low of the handle -- whichever is tighter.
Target 1 (T1): 2.5 ATR above entry -- the first scale-out point. At T1, consider selling one-third to one-half of the position and moving the stop to breakeven on the remainder.
Target 2 (T2): 5.0 ATR above entry -- the full measured move. This wider target reflects the pattern's tendency to produce extended runs when it works. O'Neil's research showed that successful cup and handle breakouts frequently advanced 20-50% from the pivot point before building the next base.
Maximum hold: 30 days. If the trade has not hit T1 within 30 days, it is likely not working as expected. Exit and reassess.
R-profile: with a 1.5 ATR stop and 2.5/5.0 ATR targets, the reward-to-risk geometry ranges from 1.7R (T1) to 3.3R (T2) — wider than tighter patterns to reflect the larger base. We do not publish a live win rate or average R for this setup: it did not reach a conclusive edge verdict in EasySwing's out-of-sample testing, so it is not one of the active picks. For more on how to size positions using R-multiples, see position sizing.
Cup and Handle vs VCP
The cup and handle and the VCP (Volatility Contraction Pattern) are related but distinct patterns. Understanding the differences helps you apply the right expectations:
Cup and Handle:
- Larger base structure (3-6+ weeks for the cup alone)
- Deeper correction (12-35%)
- The handle is the entry trigger
- Wider stops and targets (1.5 ATR stop, 2.5-5.0 ATR targets)
- Average hold time: 16 days
- Best for stocks building a first or second base after a major advance
VCP:
- Tighter, shorter consolidation (often 2-4 weeks total)
- Shallower correction sequence (each pullback decreasing: 15% -> 8% -> 4%)
- The final contraction pivot is the entry trigger
- Tighter stops and targets (1.5 ATR stop, 2.0-4.0 ATR targets)
- Average hold time: 12 days
- Best for stocks already in an established Stage 2 uptrend
The handle of a cup and handle is, in many cases, a VCP in miniature. When EasySwing detects both patterns on the same stock, it means the setup has a larger base (cup) with a tight final contraction (VCP-like handle) -- a high-conviction combination.
When It Works Best
The cup and handle is a trending market strategy by design. It requires institutional buying pressure to drive the breakout, and that pressure is strongest in a Trending Up (Strong Bull) market regime. Like every long breakout, it fits Trending Up conditions and struggles in ranging or declining markets, where breakouts fail at resistance more often than they follow through.
EasySwing does not publish a win rate for the cup and handle: it did not reach a conclusive edge verdict in our out-of-sample testing, so it is not one of the active picks. For the strategies that are live-tracked, see the performance page.
The average hold time is 16 days, making this a true swing trade -- not a quick scalp and not a long-term hold. Combined with a 30-day maximum hold rule, you get a disciplined framework that prevents trades from turning into long-term bagholding.
How EasySwing Detects It
EasySwing's pattern recognition engine scans 2,000+ stocks twice daily for cup and handle formations. The automated detection checks:
- Prior uptrend verification: Confirms the stock advanced at least 30% before the base, using 52-week high and 200-day moving average data.
- Cup shape and depth: Measures the high-to-low correction percentage and validates it falls within the 12-35% range. Checks for U-shape rounding rather than V-shape recovery.
- Cup duration: Verifies the base has lasted at least 3 weeks. Longer bases receive a higher confluence score.
- Handle position: Confirms the handle forms within the upper 15% of the cup's price range.
- Handle volume: Checks that average volume during the handle period is below the 50-day moving average -- the "dry up" signal.
- Breakout proximity: Flags stocks where the current price is within 3% of the handle high (the buy point).
- Volume expansion: On the breakout day, validates that volume is at least 40% above the 50-day average.
- RS rank filter: Requires RS rank of 80+ at the time of detection.
When all conditions are met, the stock receives the Cup & Handle strategy tag and appears in the screener with a grade from A+ (all criteria met with strong confluence) to C (minimum viable setup). Only setups graded B or higher are included in alert notifications.
Key Takeaways
- The cup and handle is William O'Neil's classic breakout pattern -- a U-shaped base (cup) followed by a tight pullback (handle) and high-volume breakout
- Cup depth should be 12-35%, duration at least 3-6 weeks, and the handle must form in the upper 15% of the cup's range
- Volume is the key confirmation: it should dry up in the handle and expand 40%+ above average on the breakout
- Stop placement is 1.5 ATR below entry, with targets at 2.5 ATR (T1) and 5.0 ATR (T2) -- wider than VCP to reflect the larger base
- By design the pattern fits Trending Up regimes and fails frequently in ranging markets — but it did not reach a conclusive edge verdict in EasySwing's out-of-sample testing, so it is not currently in the active picks
- Cup and handle and VCP are related but distinct -- the handle is often a VCP in miniature
- EasySwing detects cup and handle formations automatically and only surfaces them when the market regime supports the pattern
Frequently Asked Questions
How long does a cup and handle pattern take to form?
The cup itself typically takes 3-6 weeks at minimum, though the strongest formations can develop over 2-3 months. The handle adds another 1-3 weeks. In total, expect the complete pattern to form over 4-9 weeks. Longer bases are generally more powerful -- they indicate deeper institutional accumulation and a more thoroughly shaken-out supply.
What is the difference between a cup and handle and a double bottom?
A double bottom has a W-shape with two roughly equal lows, while a cup and handle has a smooth U-shape with a single rounded bottom. The cup and handle also requires a handle (tight pullback near the highs) before the breakout, which a double bottom does not. Both are bullish continuation patterns, but the cup and handle specifically signals institutional accumulation through its gradual rounding.
Can the cup and handle pattern fail?
Yes — regularly, even in optimal conditions. Common failure modes include: breakout on low volume (no institutional conviction), a handle that drifts too deep (below the upper 15% of the cup), and regime shifts during the trade (bull market turning choppy). The stop at 1.5 ATR below entry limits losses to approximately 1R on failures. Note that this setup did not reach a conclusive edge verdict in EasySwing's out-of-sample testing, which is why it is not currently one of the active picks.
Is the cup and handle a bull-market pattern?
By design, yes. Its edge depends on institutional buying pressure, which is strongest in Trending Up regimes and largely absent in ranging or declining markets, where breakouts fail at resistance more often than they follow through. O'Neil himself emphasized that the best cup and handle breakouts occur during confirmed market uptrends -- "three out of four stocks follow the general market direction" (How to Make Money in Stocks, 2009).
EasySwing detects cup and handle patterns automatically across 2,000+ US equities. For tighter breakout setups, see the VCP pattern. Confirm the stock is in Stage 2 with strong RS rank before entering. Scan results are for informational purposes only and do not constitute investment advice. See our Risk Disclaimer.
Disclaimer: This article is for educational purposes only and does not constitute investment advice. EasySwing is a stock screening tool, not a registered investment advisor. All trading involves risk. Read our full disclaimer →